how to draw 3d letter a with shadow
How to Depict a 3D Letter with Drib Shadow in Procreate
I earn small commissions for purchases fabricated through links in this post. Proceeds help me to go along producing complimentary content.
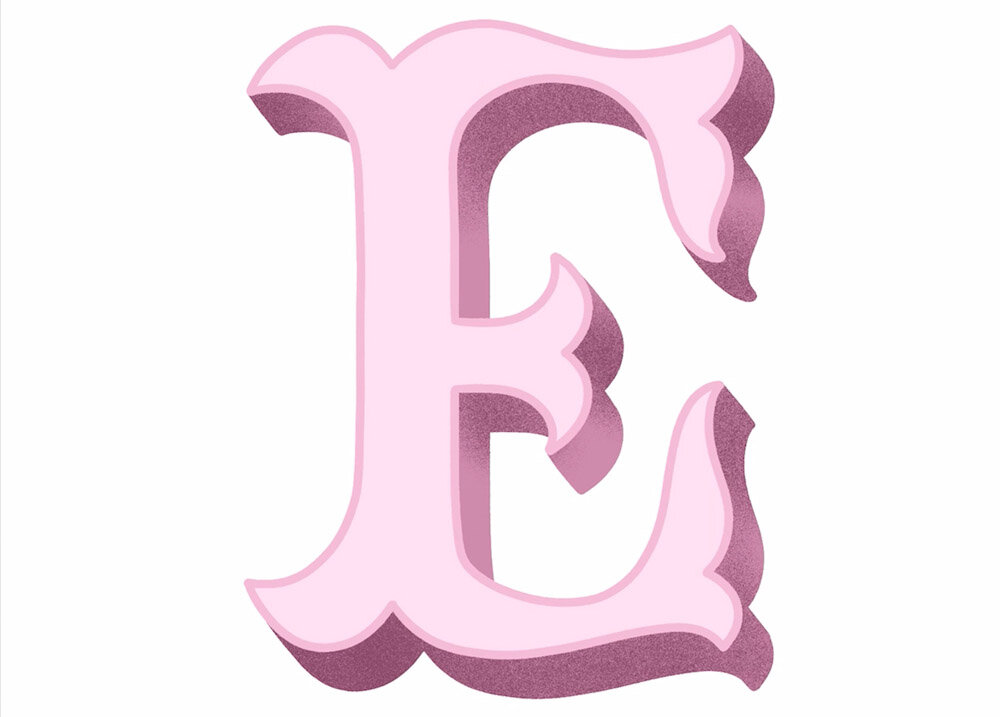
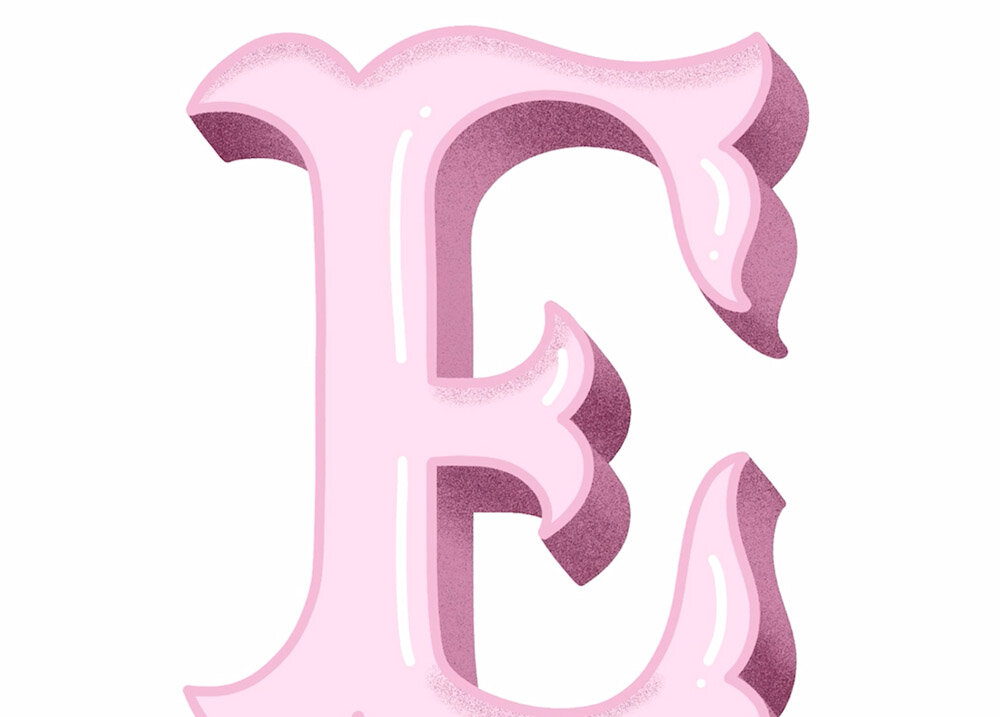
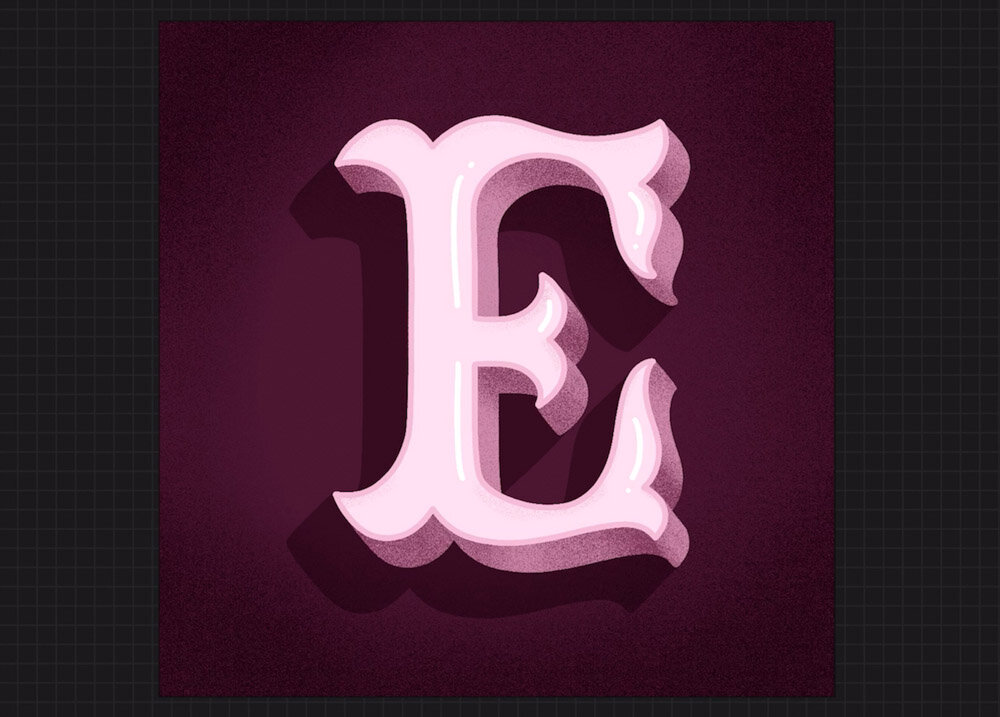
Learn how to make this three-dimensional uppercase Eastward in Procreate, with textured shading, highlights, and drop shadow upshot. You can become the color palette that I'thou using for costless by clicking the large purple button beneath! The brushes I'm using are from my Ultimate Lettering and Calligraphy Procreate Kit.
Transcript
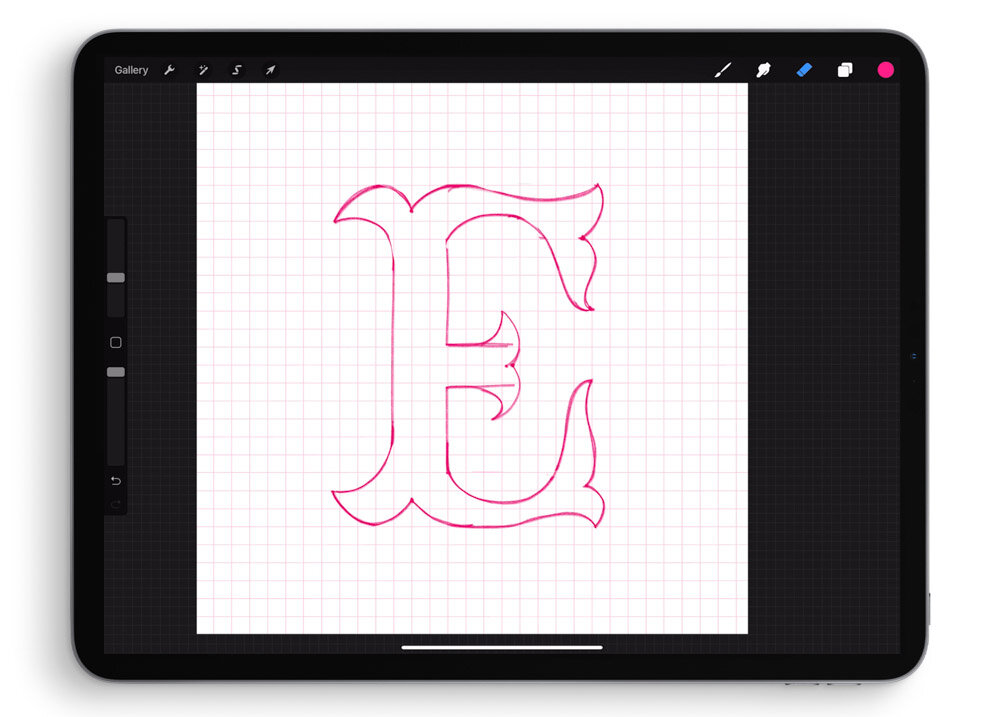
Sketch your letter in pencil
I have a square art board set hither with a basic square grid. I used my own Graph Paper Pattern Brush for this groundwork, from my Calligraphy Composition Maker for Procreate, merely you could just as well use Procreate's own Drawing Guide role.
With a pencil brush, I start past sketching a bones, geometric Due east equally my starting point. And so I'one thousand going in and turning all the sharp corners and flat sides into curves. This is a quick and easy style to add decoration to any majuscule alphabetic character!
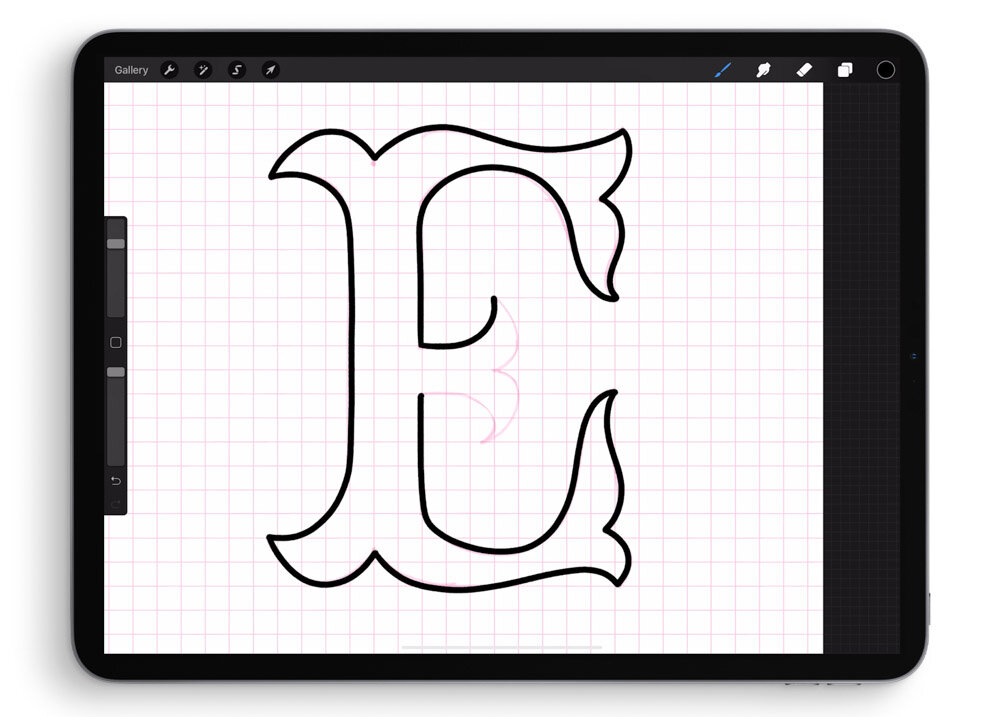
Trace the outline with a monoline pen
Now, I'll come over and select my Molly's Favorite Monoline Pen brush. This is role of my Ultimate Lettering and Calligraphy Procreate Kit. I'm just going to trace around my sketch layer on a new blank layer. You tin can see that I'm going very slowly and making sure that I actually attach to those curves, smoothing them out equally I go.
With my outline consummate, I'll open my layers palette and hide my sketch layer so I no longer see it, because I'm not going to utilise information technology again.

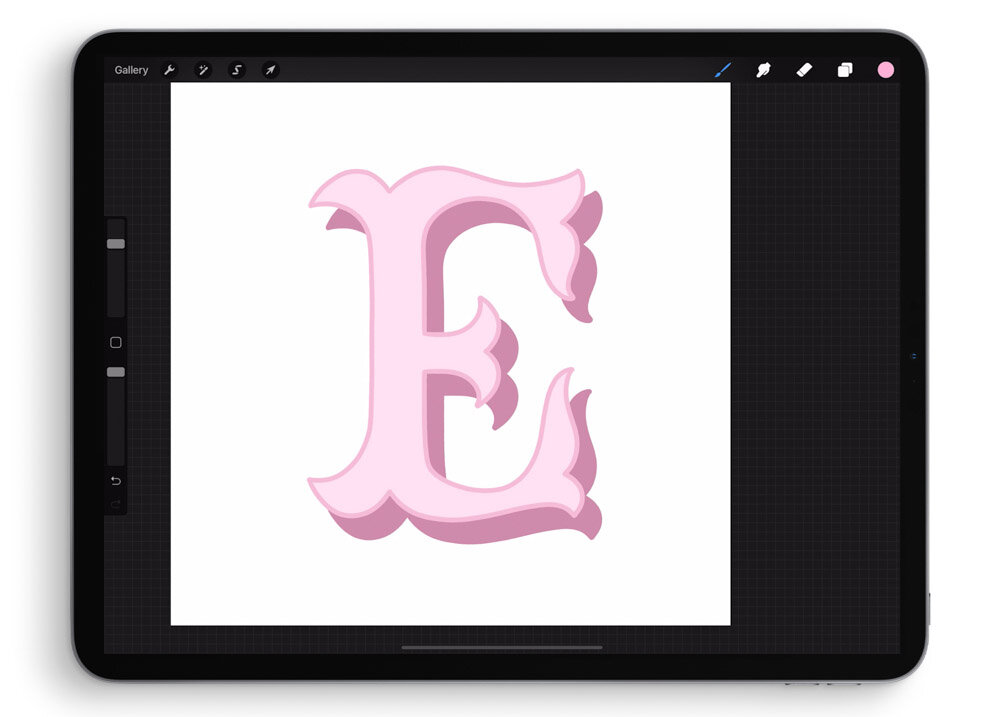
Duplicate and recolor
Adjacent, I indistinguishable that outline layer and select the lower of the ii layers.
I'll fill in the lower layer with black by dragging and dropping my black swatch into it. Then I'll choose a very low-cal color – light pinkish – and drag it over as well. This turns the lesser E into solid light pink.
Turning back on my outline layer (the top layer), you lot can see that the outline now sits on height of my solid layer. I'll recolor that outline with a slightly darker pink by dragging the darker pink swatch over on top of the outline.
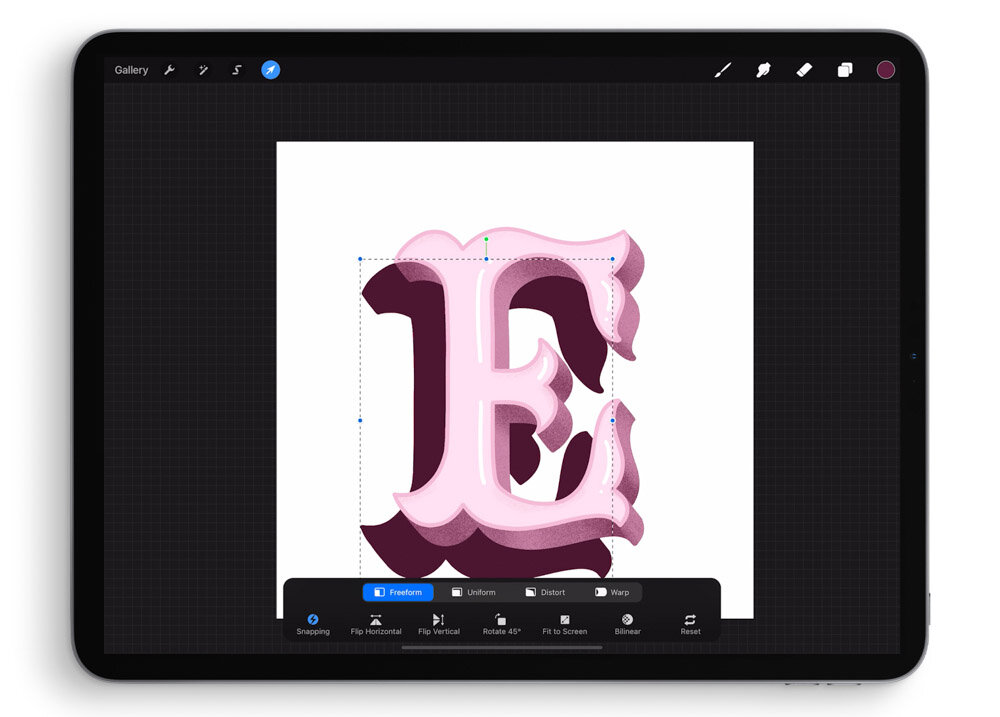
Create offset dimension
Coming back to my layers palette, I will indistinguishable the solid, filled version of the E, and select the lower of the 2.
And so, selecting the transform tool, I'll drag that lower version of the filled layer downwardly and to the right.
I'll at present choose a slightly darker pinkish and elevate information technology over to fill that lower layer.
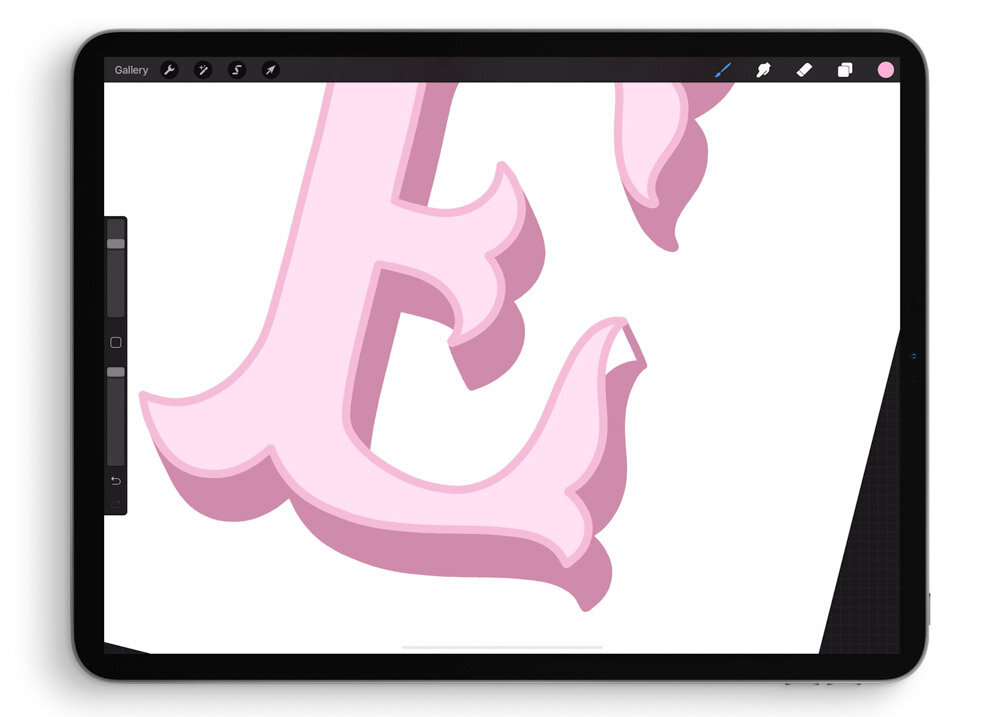
Connect the corresponding dimension points
Now is when the dimension is actually going to commencement to come to life.
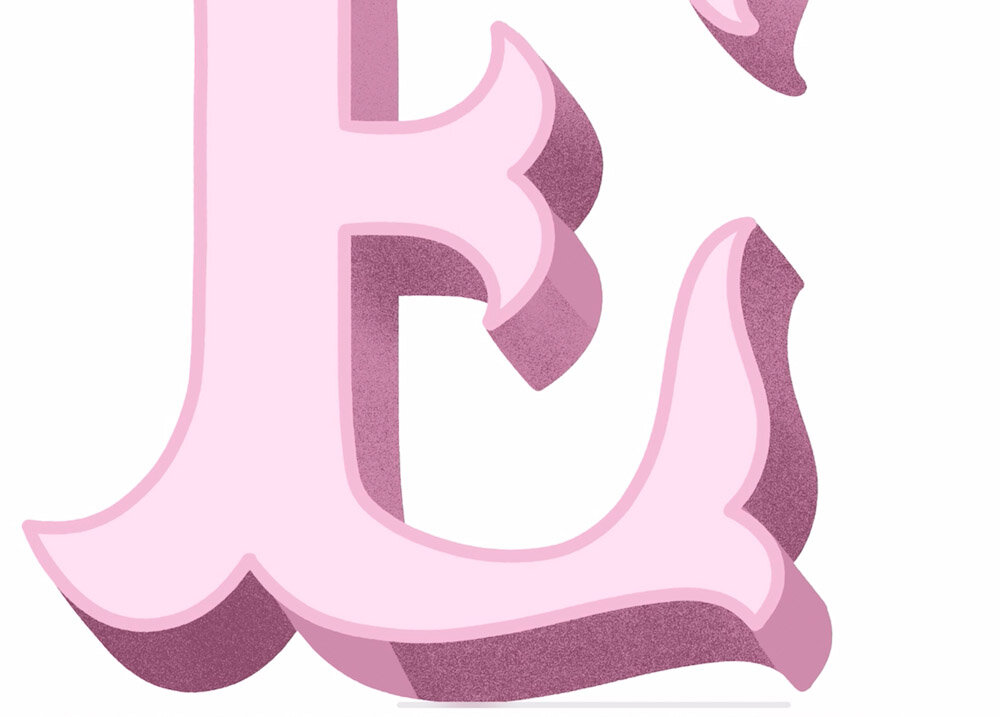
I'm zooming in and, with that same monoline brush, I'g drawing on the darker fill up layer. I'm connecting all of the places where the lower layer and the upper layer are separated, by using directly lines to connect corresponding points then filling in the spaces with color.
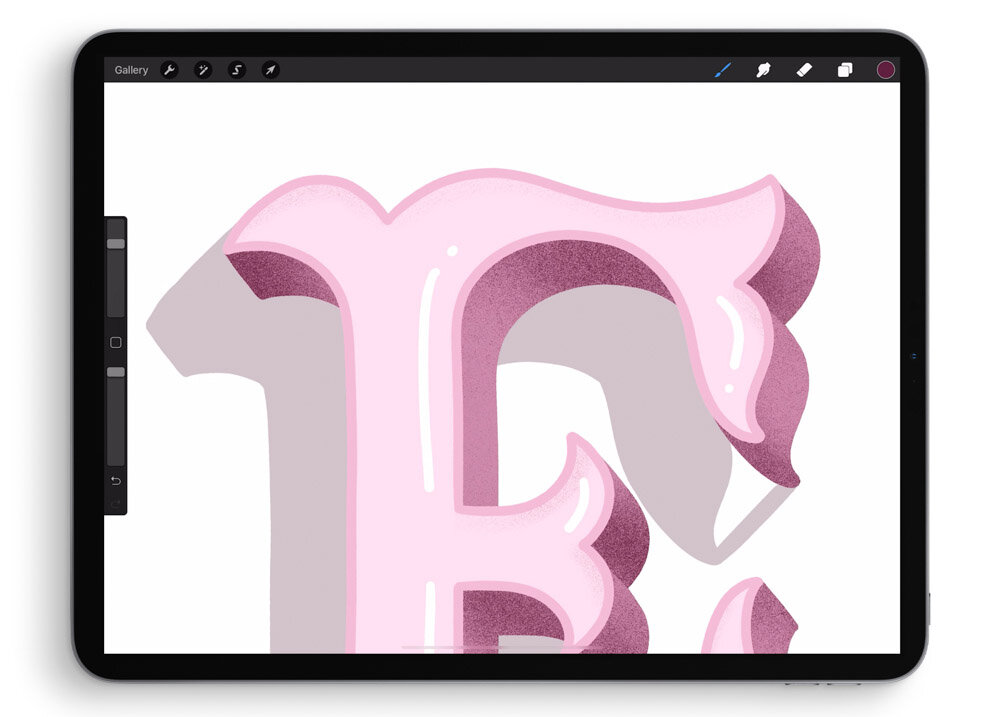
Add shading to the dimension layer
Now it'due south fourth dimension to add some shading so that information technology really looks like a light source is hitting this paradigm. I want the light to await like information technology'due south coming in from the acme, which means that shadows will be bandage downward.
So in my layers palette, I'm making sure I'1000 yet on that bottom dimension layer and I'thou adding a new layer above it. And so I'chiliad tapping the new layer once and selecting Clipping Mask. That way, when I draw in the shading, it will only touch the dimension layer below it.
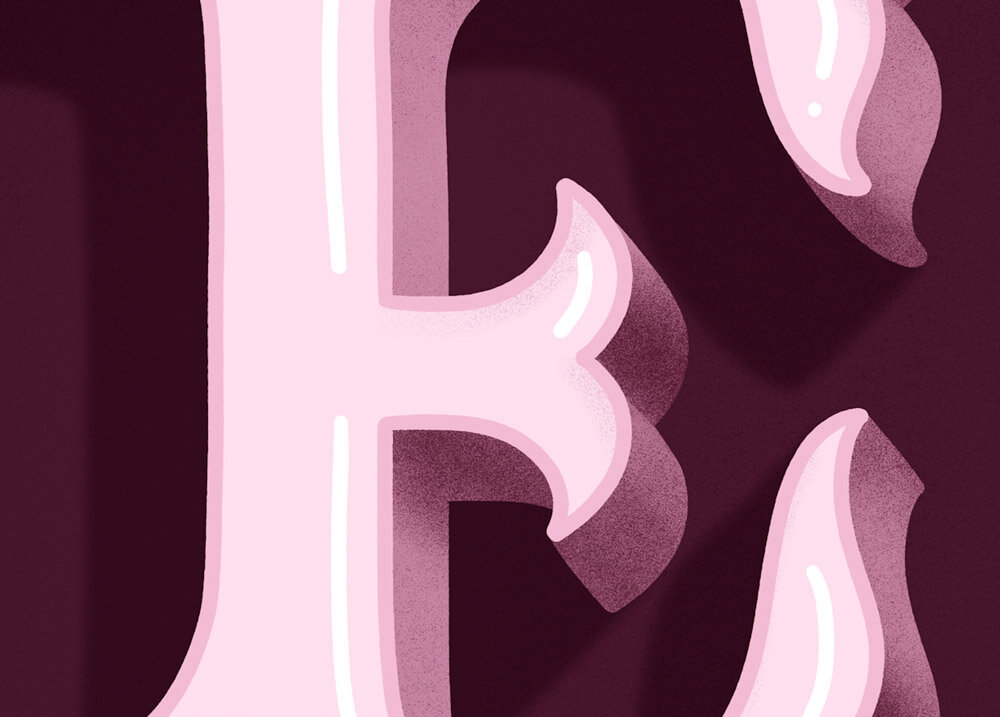
Shadow, by definition, has to be darker, so I'k selecting an even darker pink from my palette. In my layers palette, I'thousand making 100% certain I'1000 on that clipping mask layer. And in my brushes palette, I'yard selecting a grain or texture brush.
The one I'm using today is a brush of my own making that is coming out very shortly. It's nevertheless in the beta testing phase, merely below this transcript, in the resources department, are some great texture castor I propose for shading and texture!
You can see that I'thousand starting with shading the bottom because, again, if the light is coming in from the top, information technology means that the regions right underneath that dimensional space would have the most shadow (i.e. the to the lowest degree light).
I'm not worrying about being sloppy or getting the texture in areas that aren't going to exist in shadow because I am going to come up back with an eraser brush and do some refining in just a minute.
Use the eraser to blend and soften the shading
In my eraser palette, I will now select that same Monoline Calligraphy Pen brush that I used to draw the outline. I'll come up to the clipping mask layer of my shadow and draw crisp lines in the places where, in a existent dimensional piece, the regions would come to a precipitous edge. I'chiliad going to come dorsum with a much softer eraser in a moment to blur these out a piddling chip, so I'm non worrying that these wait much also abrupt at the moment.
Now I'1000 switching my eraser over to my textured brush tool. Whatever the tool is that yous used to draw your texture and shading, use that now with the eraser and come into those points that have sharp lines and really blend them out. You lot can reduce the chapters of your eraser castor if you lot want, equally well as the size, to become more or less blur hither.
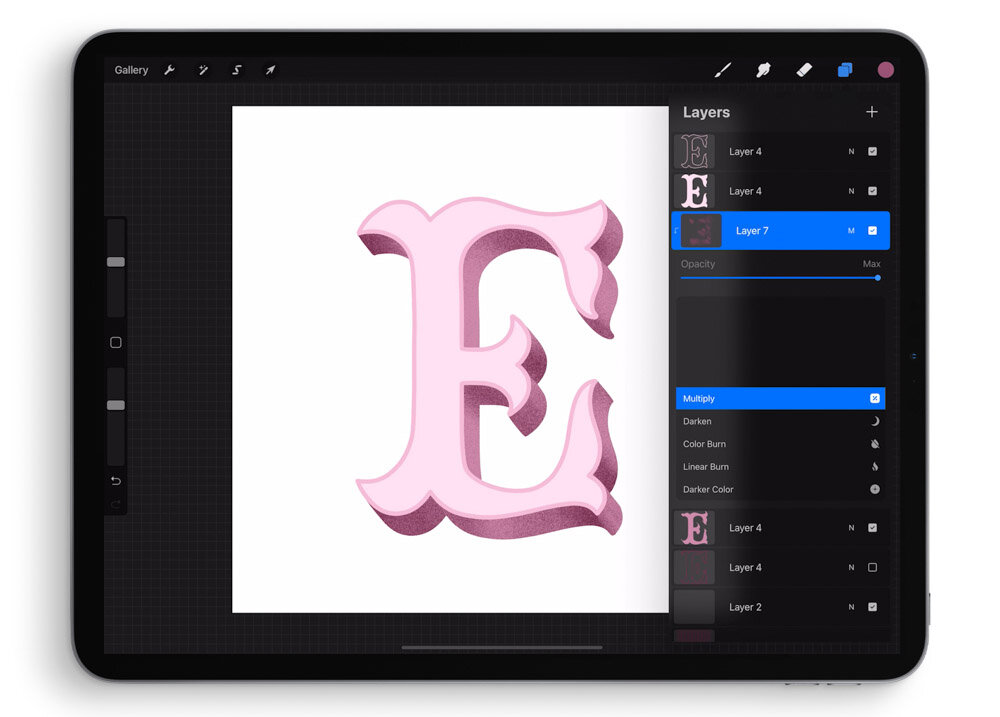
Gear up the shading layer to Multiply
And and so finally, to add a little flake more realism and darkness, I'll come back over to my shaded layer, to that clipping mask, and I'll ready its blending mode to Multiply. This is to make sure that the blending is actually perfect between the colors of the medium pink and the dark pink.
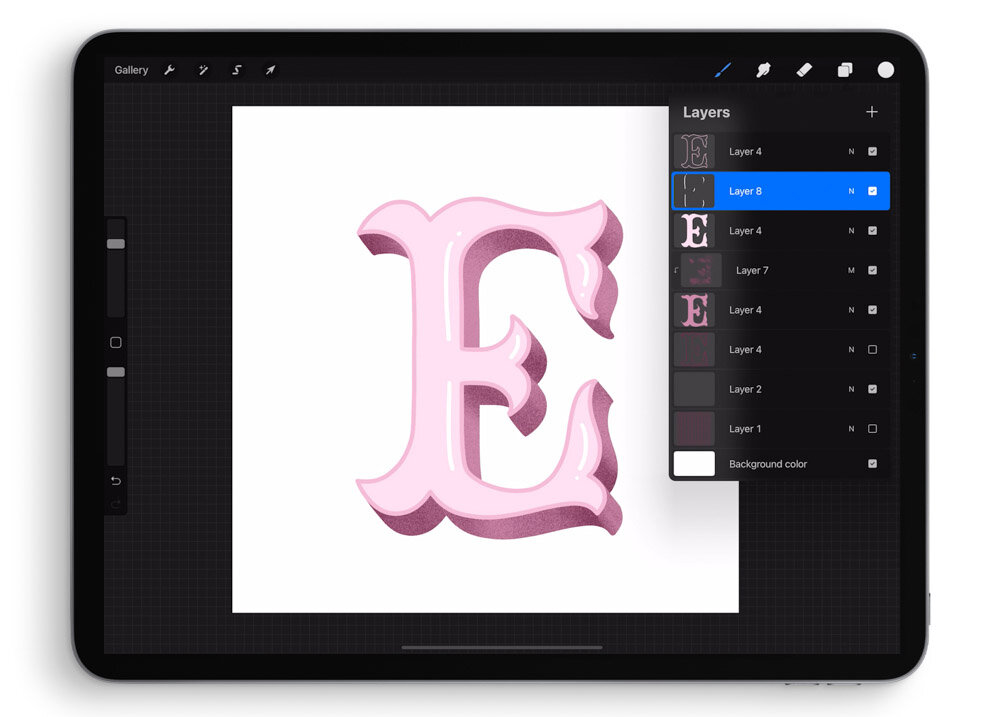
Draw highlight lines
At present, let's add in some fun light highlights! I'thou coming up to my height filled layer and I'm adding a new blank layer in a higher place information technology. So I select white from my colour palette and that same monoline brush from my brushes palette. I'm going to draw in some highlight lines hither. I'm choosing to do them up against the right side of my outline layer so it looks like the shine is coming from a consistent angle.
Add the second circular of shading
Now, let'due south add together a little scrap more than shading and texture. Come up above the calorie-free pink make full layer and add a clipping mask. At present I'll select a medium pink and come up back to my texture brush. My goal here is to brand information technology look similar a very faint shadow is being cast past that superlative outline layer onto the filled layer below it. So I'yard making these thin lines of texture underneath the top parts of the outline. And and then when I'm done with that, I'k just going to come into the layers palette and dramatically reduce the opacity so it'due south really faint and subtle. I'll even come back with my eraser and do a footling precision erasing to make information technology a little more realistic.
Create the drop shadow layer
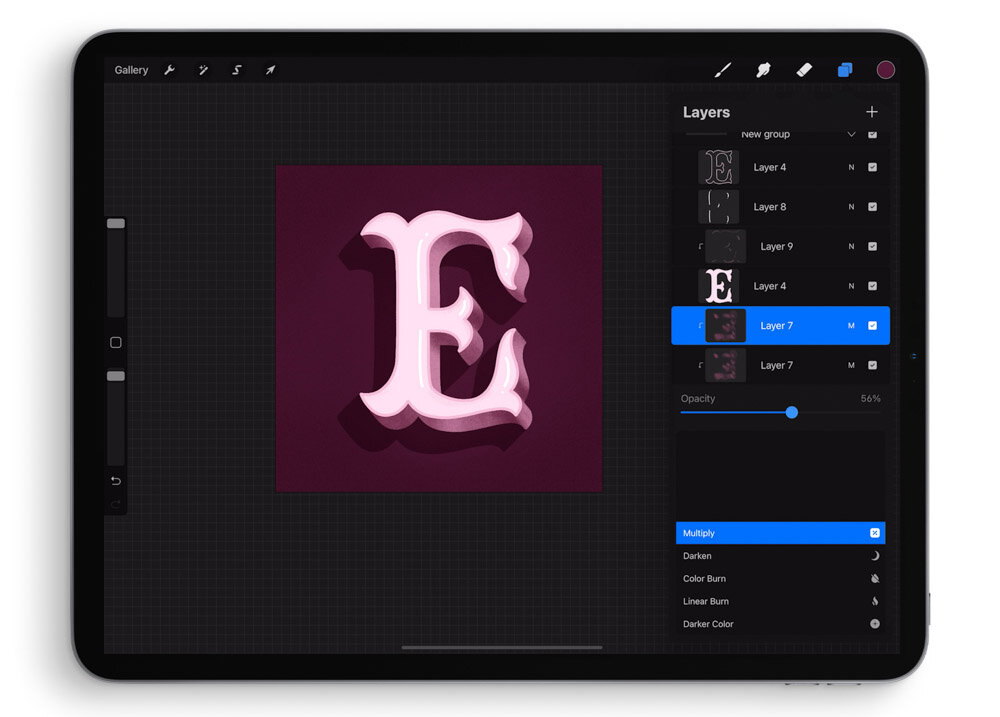
With our dimension complete, it's now time to brand a very dramatic drib shadow. And so I'm starting by grouping all of the elements of this Eastward and then far. I'm just swiping correct on each layer to select multiple layers at once, so tapping Grouping upward at the top. I now want to indistinguishable this new group and select the lower of the ii groups. Then tap it once and hitting Flatten. At present I have a flattened version of the East sitting right underneath the layered version of the E.
This newly flattened layer is going to go our drop shadow layer, so I want to fill it in with i solid, darker color. To do that, I'll tap it once and hit Alpha Lock. And so I'll select my much darker colour, tap the layer again, and select Fill Layer. Then I'll tap over again and plow off Alpha Lock.
With my transform tool, I'one thousand at present able to move this new darker layer down and to the left to create the casting of our shadow. Then, over in the layer palette, I can tap the layer and reduce its opacity dramatically. I retrieve you can already see how realistic this drib shadow is starting to await!
Fill in the distance between the shadow and the alphabetic character
Coming in with my monoline pen, I'll at present repeat the aforementioned procedure that I did when I created the dimensional layer. In other words, I'll connect all of those split points in between the driblet shadow layer and the top dimensional layer, and then I'll make full in all of those gaps with solid color.
At present group everything together by swiping right on the grouping to a higher place and hitting Group. At present I have one group for all of that artwork.
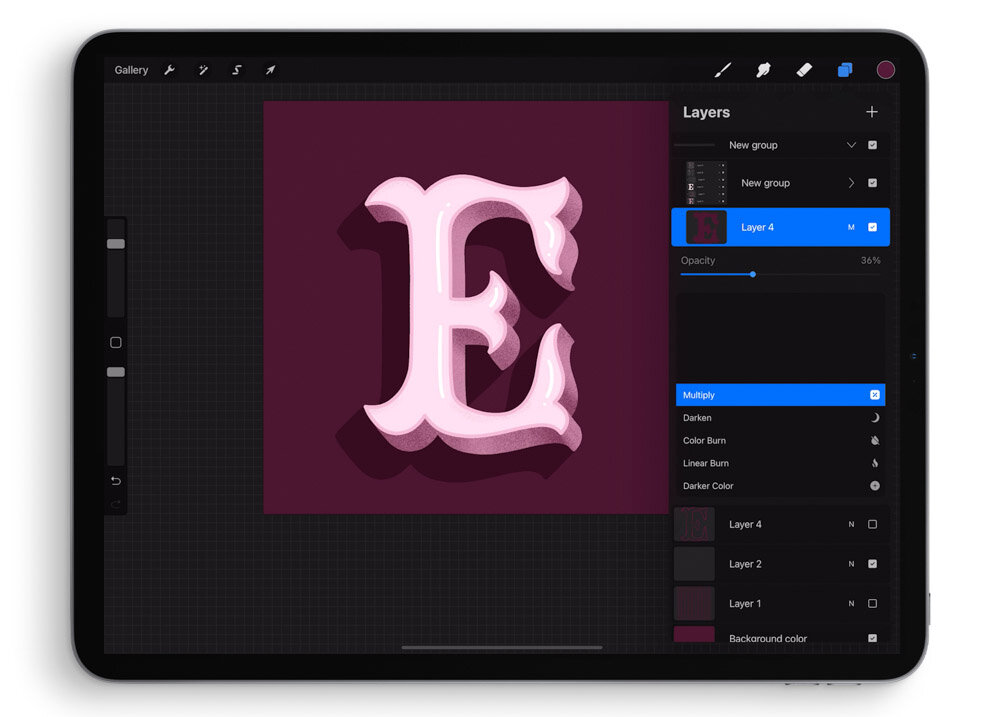
Add together a background and multiply the drop shadow
Now I'll tap the background layer to adjust its colour to a actually dark pinkish. I'll go back to my dark shadow layer and adjust its blending mode to Multiply. This, just similar with the original texture, is going to make certain that that driblet shadow blends actually realistically into any groundwork colour you have.
Add a vignette to the canvas
Making sure I'yard on the big group with all of the art on it, I'll hit transform and centre the artwork roughly in the middle of the sail. And then I'll make a new blank layer underneath that grouping and fix it immediately to Multiply. I'll come dorsum over now to that same texture brush that I used earlier. (You will pick whatever texture brush you used before.) In the night pink colour, I will create a vignette all around the artwork. This is a way of actually making sure that your lettering is going to popular off of the page and add some shadow all around the edge.
Now I'll reduce the vignette's opacity and so it'southward non quite equally dramatic – more like a subtle shadow or texture.
Optional grain texture aligning
If you lot're non entirely happy with how grainy the texture is of your original shading, y'all can do what I did here: Duplicate that original texture, then go to the adjustments console to Gaussian Mistiness > Layer. Then mistiness out that layer dramatically. Y'all tin can't come across information technology very well here, but if I turn off the bottom layer, you'll see that I accept at present a actually blurred version of the texture right on top of the original texture layer.
Both of these texture layers are set up to Multiply, then I and so arrange the opacity of each so that what I get is a blended, in-between version of the texture that is more than blurred than the original, but all the same shows the grain of the texture.
Soften the drib shadow with mistiness
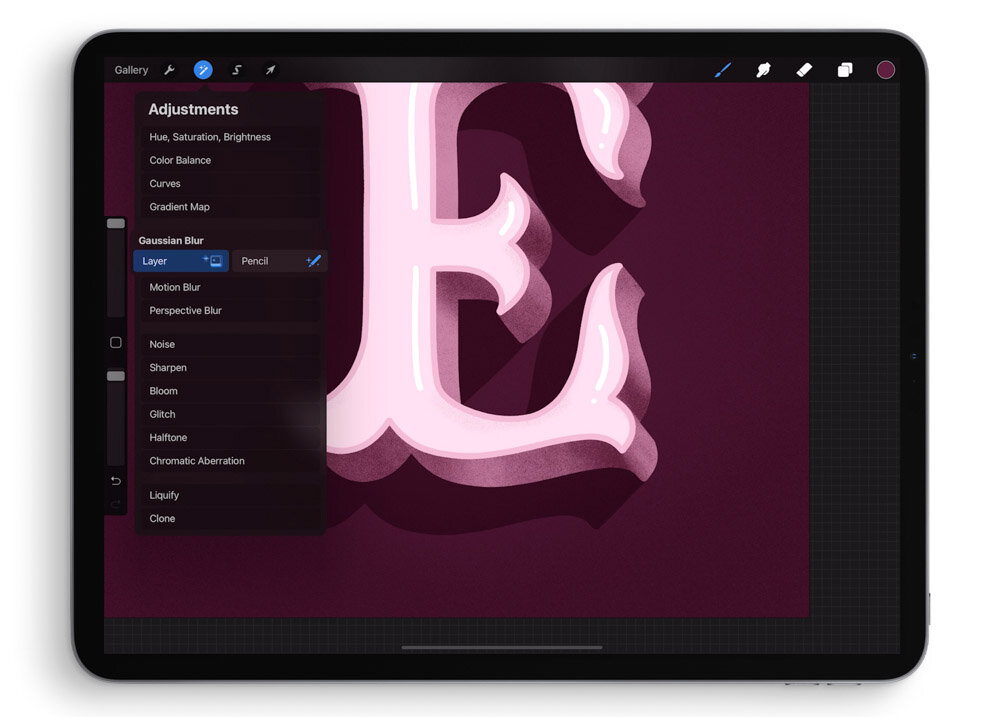
As a finishing touch, I desire to add just a piffling more than realism to this drop shadow. Very few driblet shadows are truly crisp effectually the edges, so I'll come back to my adjustments panel and choose Gaussian Blur > Layer. Then add simply a very slight touch on of blur around the driblet shadow'south border. This just makes information technology look even more than realistic.
Thank you so much for following along!
Click the large purple button below to download the color palette for free.
As ever, tag me in your work on Instagram – @mollysuberthorpe – so that I can see what yous're upwardly to!
Like this post? Please Pin information technology! Share it! Tweet it!
It'southward the all-time, free way to support artists you appreciate.
Source: https://mollysuberthorpe.com/news/how-to-draw-a-3d-letter-in-procreate
Posting Komentar untuk "how to draw 3d letter a with shadow"